
Making your own jam is a simple way of preserving your fruit harvest and "can" be a very rewarding experience. Making jam the old fashioned way does take some time depending on how much you will be making, and some pre-planning will go a long way in making this activity a fun one. This is also a perfect time to spend with your children to show them how jam is made, but a few safety rules should be set and care should be taken, after all we are working with very hot materials that can cause serious burns. But don't let that scare you away. All they need to remember is that hot glass looks the same as cold glass, and they shouldn't touch anything without mitten clad hands under your direction. School them on what thermal shock is and how to avoid it, and what to do if they should ever get a hot sticky or waxy substance on their skin. And of course, never leave your little sprouts alone during this process, and eliminate all distractions, which are all good steps to take toward making this process a safe and rewarding one. Remember, you are your child's first and best teacher, and any messes that are made can easily be cleaned up.
Please read through this recipe and process before starting. Make sure you have a clear understanding of the process and what materials and ingredients are required, this is good advice for the beginner as well as the seasoned jam maker. If you want to make a lot of jam, then you will have to make this recipe several times, jam doesn't set if recipes are doubled, I don't know why. All that being said, lets get to making some jam!
INGREDIENTS:
8 cups chopped apricots, fresh or frozen
1/4 c. lemon juice
1/2 c. water
7 c. sugar
1 pkg. Sure Jell Pectin
Yields about 5 1-pint jars
8 cups chopped apricots, fresh or frozen
1/4 c. lemon juice
1/2 c. water
7 c. sugar
1 pkg. Sure Jell Pectin
Yields about 5 1-pint jars
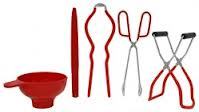
Tools of the Trade
| 
| 
|
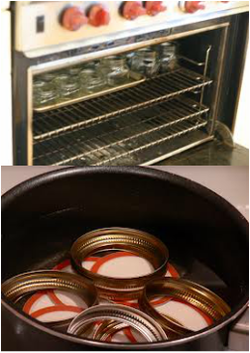
Preparing your jars is a two step process, first you have to clean all your jars, lids, and rings with hot soapy water, and then you sterilize them. This can be done in one of several ways. You can use your dishwashers sanitize cycle, or you can boil your jars for 10 min. or you can place them in a 250F oven while you are making your jam. This is my preferred method. I place the clean wet jars onto a cookie sheet, for quick and easy handling, making sure they don't knock together, and place them into the oven. When I'm ready to fill the jars, I carefully remove the hot pan from the oven. Take precautions against thermal shock, this simply means that the hot glass can break, or shatter when exposed to a sudden temperature change, like a cold breeze, cold liquid, or a cold counter top. I boil the rings, or bands of the canning jars in a large sauce pan, but the lids that have the seal cannot be boiled as this would damage the waxy seal. After the rings have come to the boil for 5 min. I turn the heat to low and then place the lids into the hot, non boiling water, and leave them there until I need them.
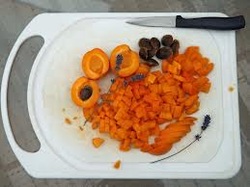
Process the apricots - wash them, no peeling is required, apricot skin is soft and will melt into the jam. Remove any ugly brown spots on the skin and any squishy flesh. Chop the fruit into smallish pieces, and discard the pits. However, if your apricots came from a local farm, or a neighbor that has trees from non-hybridized stock, then plant them. In a few short years [4 to 5] you too will have your own apricot tree! Place apricot pieces into a large heavy bottom non reactive pot and sprinkle with the 1/4 c. lemon juice and 1/2 c. water.
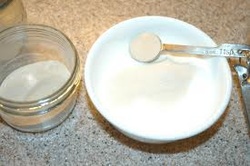
Mix 1/2 c. sugar with the pectin - Pectin is a whitish powdered thickening agent used in making jelly, jam, and preserves, it comes from apple pomace, citrus peels, or sugar beet pulp. In Greek 'pektikos' means: congealed or curdled. By mixing it with a small amount of sugar, this helps prevent the forming of pectin lumps when you sprinkle it onto the fruit. Through experience, you may want to add a little more pectin if you like your jam really thick, or less if you like it thinner.
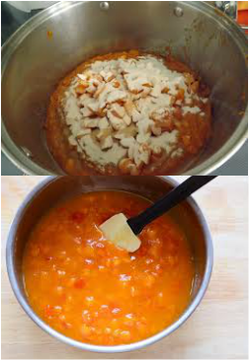
Sprinkle the sugar and pectin mixture on to the chopped apricots and stir in until combined and turn up the heat to med. high and cook until the fruit mixture comes to the boil, stirring often to make sure it doesn't burn. This will take some time if the fruit was frozen, anywhere from 10 min for fresh fruit, to 15 min for frozen fruit. Be careful of "spitting" during this process, if this happens, then just turn down the heat a bit. This mixture will be thick and "cloudy."Add the rest of the sugar when you have reached a rolling boil that can't be stirred away, carefully mix it in with a heat proof rubber scraper or whisk, the mixture will be magma-like at this point. Keeping a bowl of ice water handy is a good idea just in case you get some hot jam on your skin.
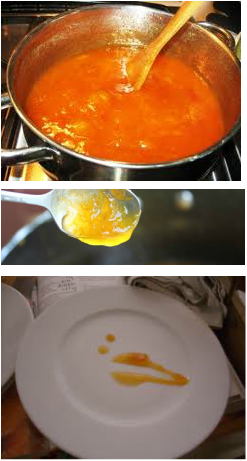
After all the sugar has been added, the mixture will turn clear. Bring this to a boil once more, once at the boil, cook for about 1 minute. Test for thickness or "set", by placing a small spoon full of jam onto a frozen spoon or a frozen plate, don't worry, the small amount of hot jam won't harm the larger plate. This process will quickly cool the jam and give you an idea of its 'set' consistency. If the jam on the spoon plops off the spoon rather than running off in a thin stream, it is thick enough. For the plate method, run your finger through the jam, if the swipe holds its shape and doesn't run, it is ready. If it is not thick enough for your liking, then continue to boil the jam for a few more minutes and test again. When you have reached your desired set, then turn off the heat and prepare to fill the sterilized jars. If the jam is too chunky, then you can use an immersion blender to make the jam smoother. Just be careful to do so with no flame on so the cord won't melt.
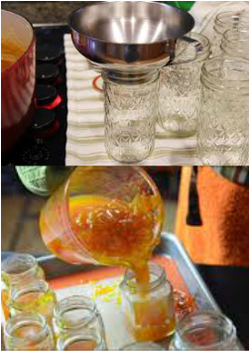
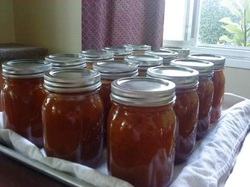
Fill the jars - You can fill the jars using several methods, either by using a large mouth funnel, your ladle, or a Pyrex measure cup. Fill the jar to about 1/2" to the top if you are water bath canning the jam and make sure no jam is on the rim of the jars, this will prevent a good seal. Simply wipe off any spillage from the rims of the jars with a clean damp towel, I use paper towels. Remove a lid from the hot water with a tongs, and shake off any excess water. Without touching the underside of the lid, place it on the rim of the jar and follow with a ring, or band and tighten only hand tight. If you over tighten you can cause the lid to pucker, and it won't seal properly. Be careful, the jars will be extremely hot. I don't hot water process my jam since I don't have a large enough pot, so at this point I let them cool slowly for a full day, making sure they are sealed, and then I place them in the fridge. By pressing on the tops of the lids, if there is not give, then the jars are sealed. You will hear a very satisfying "pop" during this process. If the jars haven't sealed, then something went wrong, probably the rim was not clean. You can still eat the jam, you just can't put it on the shelf, you have to keep it in the fridge. This jam keeps for about one year in the fridge if it lasts that long.
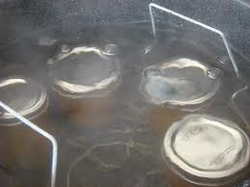
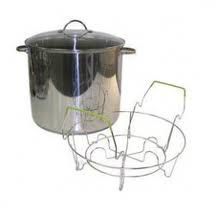
Hot Water Bath Processing - this method is used for acidic foods, but non acidic foods require pressure canning. Please read, and follow the instructions on pressure canners, they all have a little different methods of use depending on the canner. A good resource for pressure canning is Ball's Blue Book. Jam is okay with the hot water bath method since it contains lemon juice and a ton of sugar to help preserve the fruit. Make sure the water comes at least about 1" over the tops of the jars and that they are resting on a wire rack or towel to keep them off the bottom of the pot, and are not touching one another. This prevents the jars from breaking while they are in the bath. If you have a very large pot, then you may be able to stack jars on top of one another, just as long as the jars don't touch the bottom of the pot, or make glass to glass contact. Bring to a boil and maintain the boil for 10 min. Carefully remove the jars from their bath and set them on a toweled cookie sheet, or tray to prevent thermal shock, and let them cool undisturbed for 24 hours.
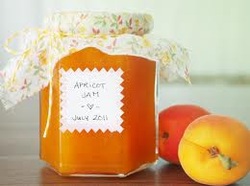
Give As Gifts - Once cooled, and seals are confirmed, then remove the bands from the jars to prevent them from rusting and place in your pantry, or make some cute labels and tie on a fun fabric with some twine, raffia, or ribbon and give them as gifts to your friends, family, and neighbors to enjoy the delicious fruits of your labor!

 RSS Feed
