
Written by Heather Zubiate
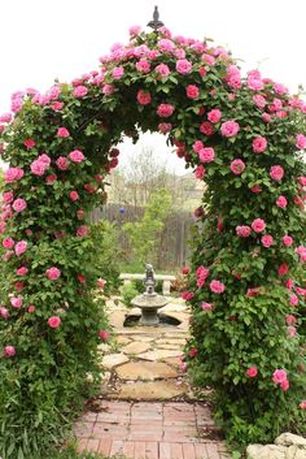
There is something so whimsical and inviting about a rose covered arbor, isn't' there? The geometrically shaped floral abundance beacons one to walk through its fragrant portal, which gives the captivated viewer a framed glimpse of what is awaiting them on the other side. A rose covered arbor, I feel, is an essential feature to any quintessential cottage garden, and this is exactly what I have in mind for our front entrance from the street. Well, instead of a fountain as seen in this picture, you will see our front door with its recently constructed red screen door!
For this project, I did make a plan, one that included both wood and rebar. As much as I hate to follow trends instead of setting them, I like the rebar look. It would have cost $90 to $120 to make, but to save me money, my son jumped in and reworked my plans. Rather than the elaborate wood and metal design I had in mind, he went for an easier all wood design, which sported a flat top. Dear reader, if you know me, I'm not convention-al, and when it comes to construction, if it's not difficult or emotionally painful to produce, then why bother? Some of you will understand what I mean. I guess in some ways I am a tortured artist. And so, I simply had to amend my son's simple design to include a difficult to construct pointed arch!
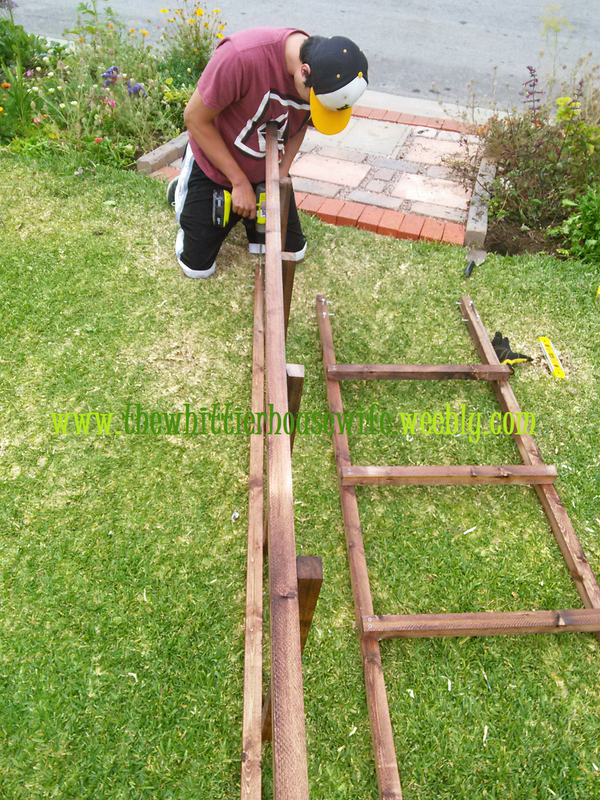
Our design, which Timothy is working on here, called for cheap 2 x 2 x 8 pine, which we coated in that wretched copper stuff that stops it from rotting and keeps it off the ter-mite's menu. We made simple ladders, the pre-buried sides measured 7ft. tall and 2ft. wide. The overall width of the arbor would be around 6ft. and its finished height would be around 8ft. - - eh, approximately. I'say that because our intended finish measure-ments didn't exactly happen, because we are not the best carpenters.
Now I realize that's pretty big for an arbor made from such small dimensional lumber. In hindsight, what looked okay on paper, looks quite different and some what squatty in real life. We should have used 4 x 4 x 8 posts, which would have been more in scale, and possibly safer. I guess we will find out if that was a major design flaw once the grape vine and climbing rose I'm going to plant on either side will prove to be too strong for the arbor's demure frame. Then it will be back to the drawing board!
Now I realize that's pretty big for an arbor made from such small dimensional lumber. In hindsight, what looked okay on paper, looks quite different and some what squatty in real life. We should have used 4 x 4 x 8 posts, which would have been more in scale, and possibly safer. I guess we will find out if that was a major design flaw once the grape vine and climbing rose I'm going to plant on either side will prove to be too strong for the arbor's demure frame. Then it will be back to the drawing board!
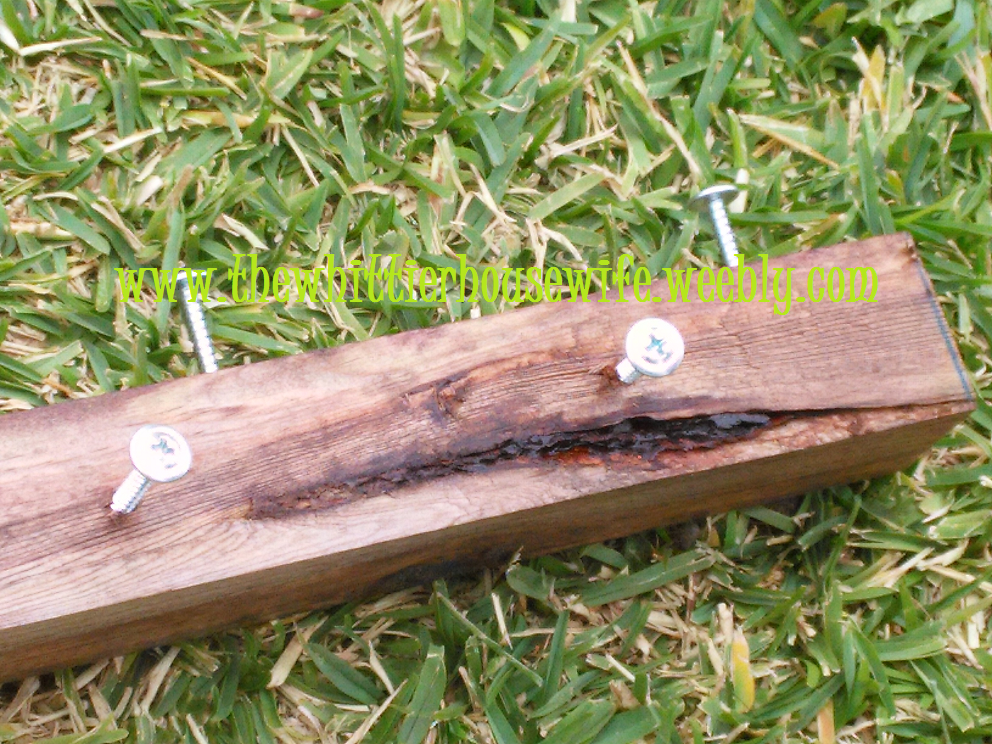
Anyway, to help the wood posts (I use that term lightly here) hold more securely into the concrete footings, we attached metal screws at the bottom as a kind of DIY rebar. Unfortunately, while we were hand digging the small footing holes, I came across the gas line about 1ft. down. That is where we stopped, we were going to dig 2ft. down, but I didn't want to pour concrete around the copper gas line.
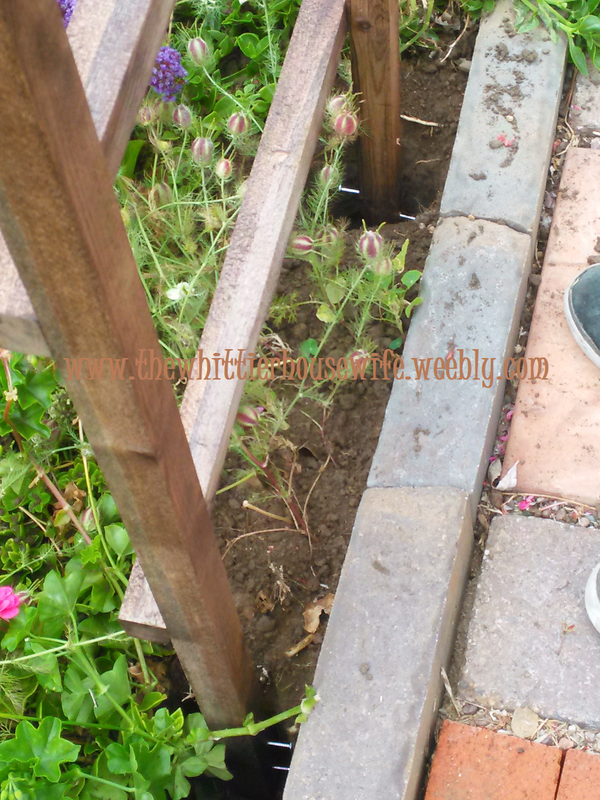
Because we didn't go down as deep as we had originally planned, we needed to remove some screws and place them lower on the posts. No big deal. We set the posts into their holes and got to the painstaking business of making sure they were plumb, level, and even in height! This essential task WAS NOT EASY at all!!! Why? Because the site I chose for the arbor to rest is sloped in two directions. Sorry Timothy. Many colorful metaphors later, we got things as close to perfect as we could before adding the concrete.
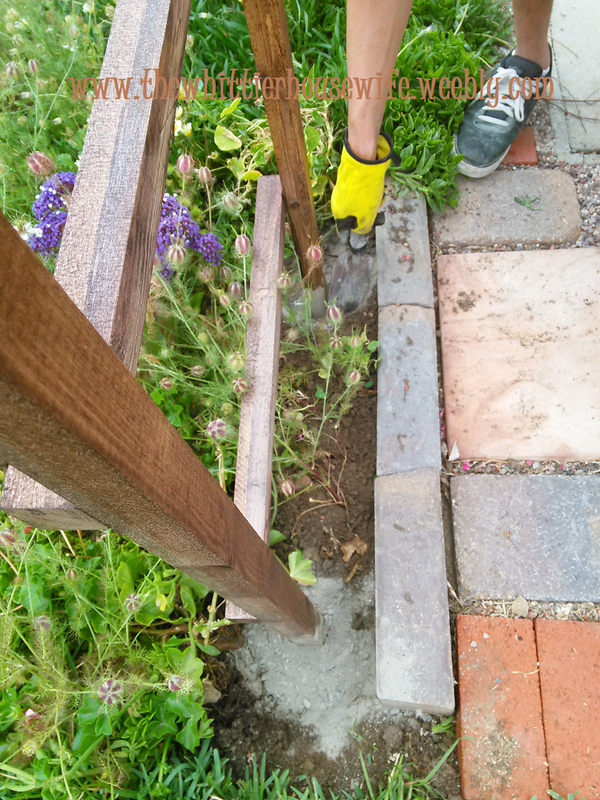
Here, Timothy is carefully scooping in the dry concrete he mixed special for the occasion. Dry? Yes, dry mix went into the holes, not wet. Why? Because we felt it would be easier to make any adjustments if the mix was dry, it's NO fun to make critical and time con-suming adjustments when you are racing against the drying time of fast setting concrete! Once we got the sides to be level, plumb, and even, then we added water to the well com-pacted concrete mix and let nature take its course.
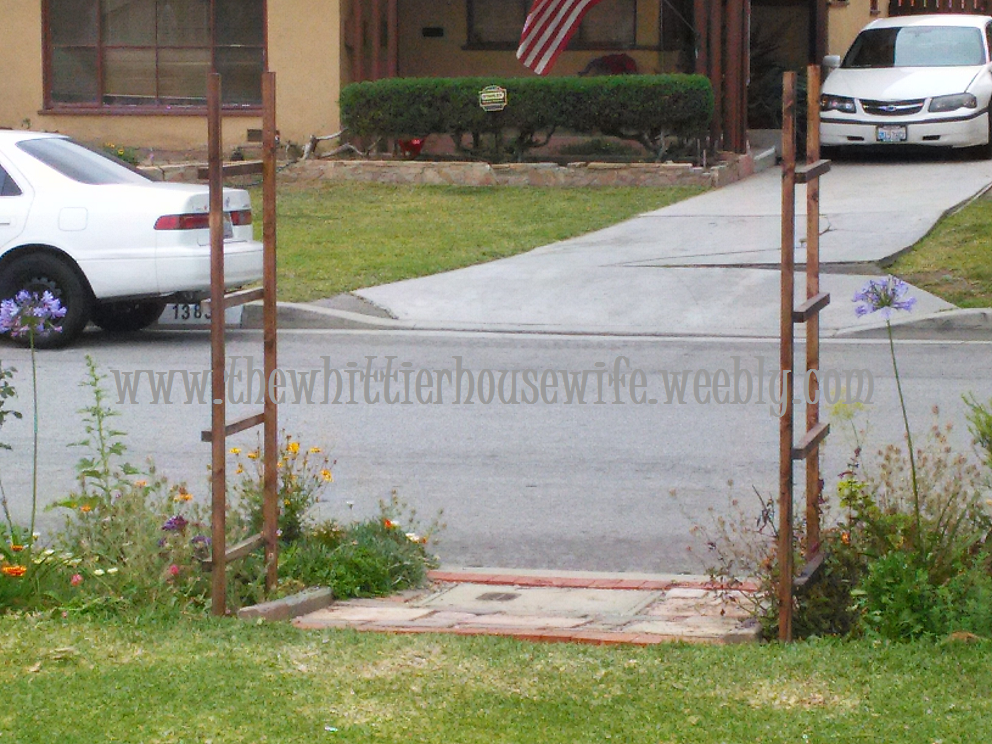
Here they are - - mostly level, plumb and even! While that was setting up, Timothy and I started the painstaking task of constructing the pointed arch! This was going to be the most difficult,and the most important part of the whole project. As you can imagine, angles are geometrical, and Geometry is MATH!!! Ahhhhhhh!!! I HATE MATH almost as much as I hate construction!

Isn't it awful? Just look at all those numbers formed into some sort of wordless sent-ences....oh the horror! Not to worry, my boy had this part covered. With the help of his trusty super expensive higher-math calculator, those pesky angles were figured out in no time. Knowing the angles is essential when it comes time to stand in front of the dreaded compound miter saw. But first, we wisely did a few sample cuts to make sure the angles worked only to find the angles my son carefully calculated didn't work. Oh the agony!
This was not my son's fault, he did everything right, formula wise. Inexperience in three dimensional construction (as opposed to flat paper drawings) caused the error in his ciphering. The 2 x 3 ridge beam was not accounted for. After some hands on finagling, heated discussion and debate, the problem was solved. Well... sort of. Our angles were and still are not quite right. Personally, I blame the saw, it MUST be out of square!
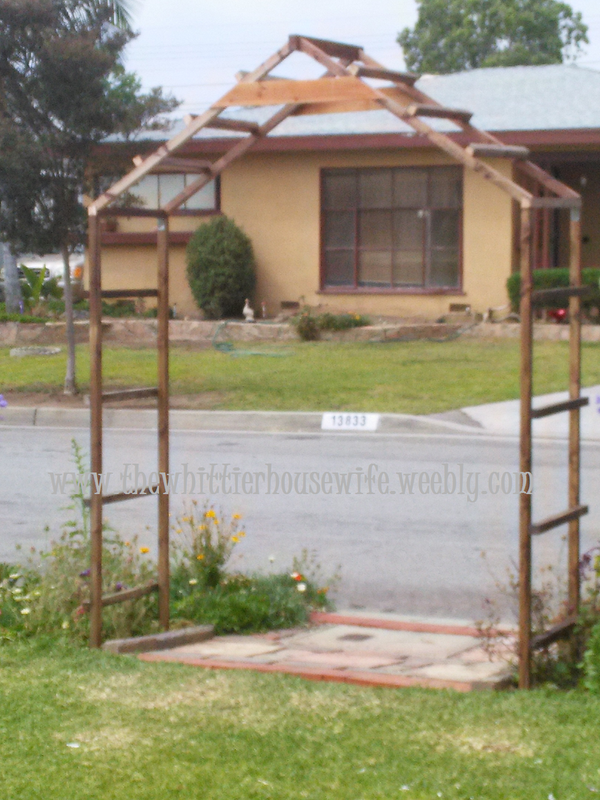
Next, we rigged a way to assemble the arch on the work table so we could move it to the waiting arbor sides without it wracking. I wish I had taken a picture of it, but I was in the moment and forgot all about taking pictures. Basically, we attached two 2 x 4 x 8's to the end pieces to keep them in place (at exactly 74" apart) while we erected the rest of the arch. This may be hard for you to believe dear reader, but I don't verbally articulate the ideas in my head very well, so I need to use a lot of visual aide when constructing projects with my guys. My son is also at that age when he knows he knows more than I do, you know? He forgets that he is still learning that I actually know things -- a lot of things, and that there is a method to my madness. Somethings take time to do, and if you want to do them right, then the time must be taken! We had to make the supports for the arch, and that took time. Once he saw what I had in mind, he understood. Whew!
And as with most of our projects, we needed to call in the big guns, my husband, to help us finish the %$&*#@ arch! Thankfully my husband brings with him a certain familiar comedic relief when things aren't going right, and they weren't. He also knows a thing or two about building stuff, and our son listens to him a little bit better than to me. A little bit. Once we carried the arch to the front and secured it to the sides with four angle brackets, we were able to remove the supporting 2x4's. I put some decorative wood at the top to help stability too, as we designers know, form follows function.
This was not my son's fault, he did everything right, formula wise. Inexperience in three dimensional construction (as opposed to flat paper drawings) caused the error in his ciphering. The 2 x 3 ridge beam was not accounted for. After some hands on finagling, heated discussion and debate, the problem was solved. Well... sort of. Our angles were and still are not quite right. Personally, I blame the saw, it MUST be out of square!
Next, we rigged a way to assemble the arch on the work table so we could move it to the waiting arbor sides without it wracking. I wish I had taken a picture of it, but I was in the moment and forgot all about taking pictures. Basically, we attached two 2 x 4 x 8's to the end pieces to keep them in place (at exactly 74" apart) while we erected the rest of the arch. This may be hard for you to believe dear reader, but I don't verbally articulate the ideas in my head very well, so I need to use a lot of visual aide when constructing projects with my guys. My son is also at that age when he knows he knows more than I do, you know? He forgets that he is still learning that I actually know things -- a lot of things, and that there is a method to my madness. Somethings take time to do, and if you want to do them right, then the time must be taken! We had to make the supports for the arch, and that took time. Once he saw what I had in mind, he understood. Whew!
And as with most of our projects, we needed to call in the big guns, my husband, to help us finish the %$&*#@ arch! Thankfully my husband brings with him a certain familiar comedic relief when things aren't going right, and they weren't. He also knows a thing or two about building stuff, and our son listens to him a little bit better than to me. A little bit. Once we carried the arch to the front and secured it to the sides with four angle brackets, we were able to remove the supporting 2x4's. I put some decorative wood at the top to help stability too, as we designers know, form follows function.
Voile la! Our big little garden arbor is done! We still have all of our fingers, and we didn't even make the usual three trips to Home Depot! Well....okay, Timothy is going to get four more angle brackets when he gets off work, but that doesn't count since he is already there! Okay...so I might be adding some more decorative wood pieces to it as well, which will involve at least one more trip to the orange box store. My son told me to just leave it alone when I told him my plans, but that is crazy talk! We tortured artists NEVER really know when to stop! Do we?
All that we need to do now is plant the grape vines on the left, and some day, I will plant a Cecile Brunner climbing rose on the right. I will keep you posted of the arbor's progress. What embellishments will I add? Will I find the elusive and much desired Madame Alfred Carriere rose, or will I have to settle for the ubiquitous, all be it suitable, Cecile Brunner rose? Stay tuned to find out!
All that we need to do now is plant the grape vines on the left, and some day, I will plant a Cecile Brunner climbing rose on the right. I will keep you posted of the arbor's progress. What embellishments will I add? Will I find the elusive and much desired Madame Alfred Carriere rose, or will I have to settle for the ubiquitous, all be it suitable, Cecile Brunner rose? Stay tuned to find out!
The Whittier Housewife reminding you that....

Until the next exciting construction episode, adieu!


 RSS Feed